Refresh & Refurbish with Ease
Refresh & Refurbish with Ease
Who says you need a complete renovation to update your home for spring? Follow these instructions for the simplest home improvement solutions that can help you transform each room from dismal to dashing.
Try out these clever renovation tips for yourself, and let us know what you think! Share the photos of your finished products on Facebook or Instagram using the hashtag #ALMcreate, and follow us for more inspiration.
For more money-saving decorating tips, visit americanlifestylemag.com/spring.
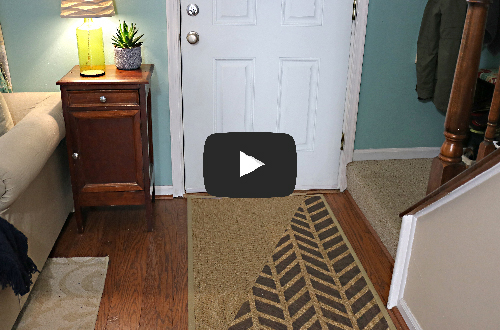
Area Rugs
An area rug is one of the simplest ways to add depth and vibrancy to any room, but if you can’t seem to find one that fits with your current decor, why not use paint for a creation that is distinctively your own?
Materials
- Short-weave rug
- Template stencil
- Painter’s tape
- Paintbrush
- Latex paint
- Fabric protector
- Start with any short-weave rug, preferably one with untreated fibers.
- Decide on the pattern you want to paint, and, if necessary, cut out a stencil using cardboard.
- Cover any areas you do not wish to paint with painter's tape (pushing down firmly to prevent bleeding). Don't forget the edges.
- Paint the rug in a well-ventilated area. Brush both with the weave of the carpet and against it to fill the space.
- Paint the rug in small sections, removing the tape within 3-5 minutes of painting, which will ensure crisp lines.
- If desired, spray with fabric protector.
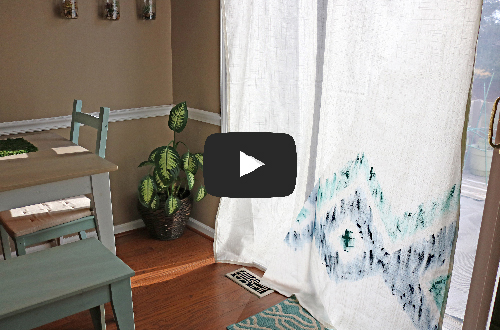
Curtains
Whether you’re going for a dramatic feel or a light and cheerful one, adding color or pattern to your curtains is a great way to personalize a room and complement its design.
Materials
- Painter’s tape
- Drop cloth
- Latex paint
- Paintbrush
- Paper towels
- Lay the curtains on a drop cloth, and mark off a pattern or design (e.g., chevron or stripes) on your curtains using painter’s tape.
- Add a bit of paint to your brush, and blot off any excess onto a paper towel. Then brush the fabric using light strokes.
- Once the paint is dry, remove the tape.

Metal Fixtures
There’s no question that metal can be hard to clean, especially sink and tub handles that get covered in soap and hot water on a daily basis. A quick coat of paint can help hide old damage and brighten up a room.
Materials
- Sandpaper, coarse
- Painter’s tape
- Plastic drop cloth
- Respirator mask
- All-surface spray paint, metallic
- Clear lacquer spray paint
- Razor blade or utility knife
- Remove all of the fixtures you want to paint. Make sure to not use any fixtures that cannot be removed for up to 48 hours beforehand to ensure they are dry.
- Sand the fixture with sandpaper, making sure to completely wipe away any dust.
- For fixtures that cannot be removed, use painter’s tape around the edges to prevent bleeding. Around the perimeter, attach a plastic drop cloth.
- While wearing a respirator mask, apply two even coats of spray paint to the fixture from about six inches to one foot away.
- Once dry, apply two coats of clear lacquer.
- Once everything is dry, score the edges of the tape with a razor blade. Peel the tape away slowly. Reattach the fixtures.
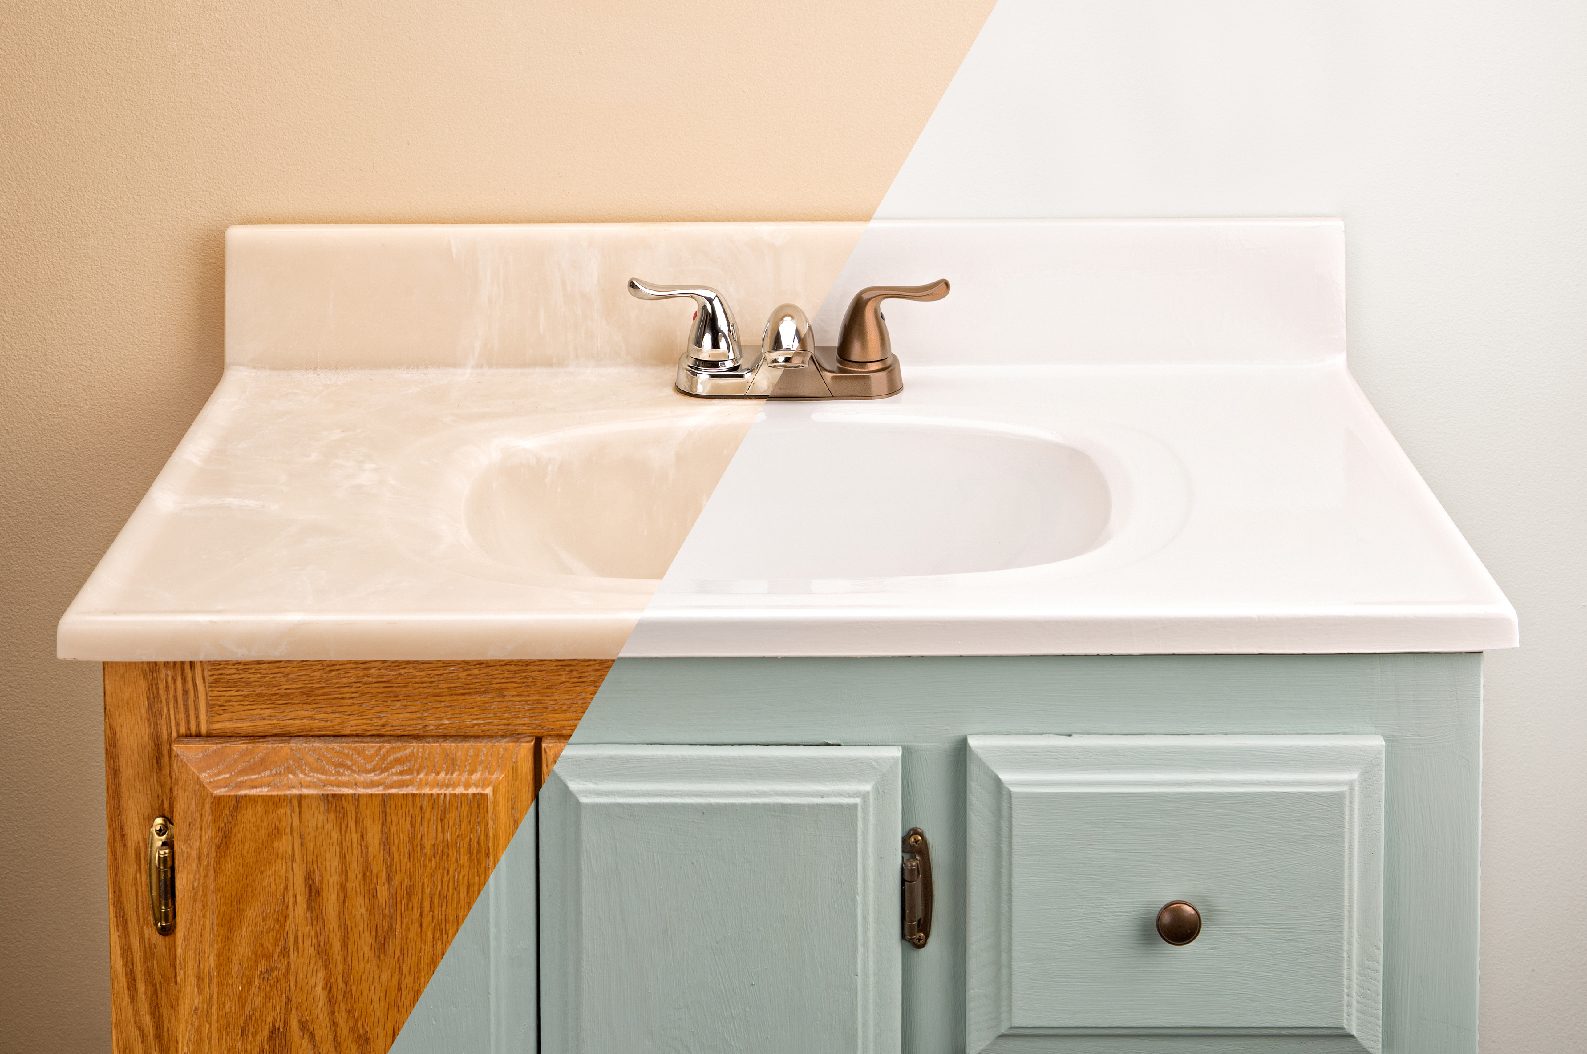
Sink/Cast-Iron Tub
Sinks and cast-iron tubs can look dingy and dull after years of wear and tear. Whether you’re looking to brighten your bathroom or cover up years of hard use, there’s nothing a little paint can’t fix.
Materials
- Painter’s tape
- Kitchen and bath cleaner
- Steel wool
- Respirator mask
- Nylon paintbrush
- Epoxy paint
- Remove all of the hardware. If it is not easily removed, tape off with painter’s tape.
- Clean the surface well with cleaner. Rinse and dry. Then scour the entire surface with steel wool. Make sure to wipe down any residual dust. (These steps may need to be repeated multiple times until the surface is as clean as possible.) Make sure to let dry completely before painting.
- Using the painter’s tape, tape off the drain and any areas around the wall you do not want painted.
- Wearing a respirator mask, carefully stir the epoxy. Apply the initial coat, making sure to use light paint and long strokes.
- Allow the first coat to cure for up to 72 hours before applying the second coat.
- Allow the second coat to dry for up to 72 hours before removing the painter’s tape and reattaching hardware.
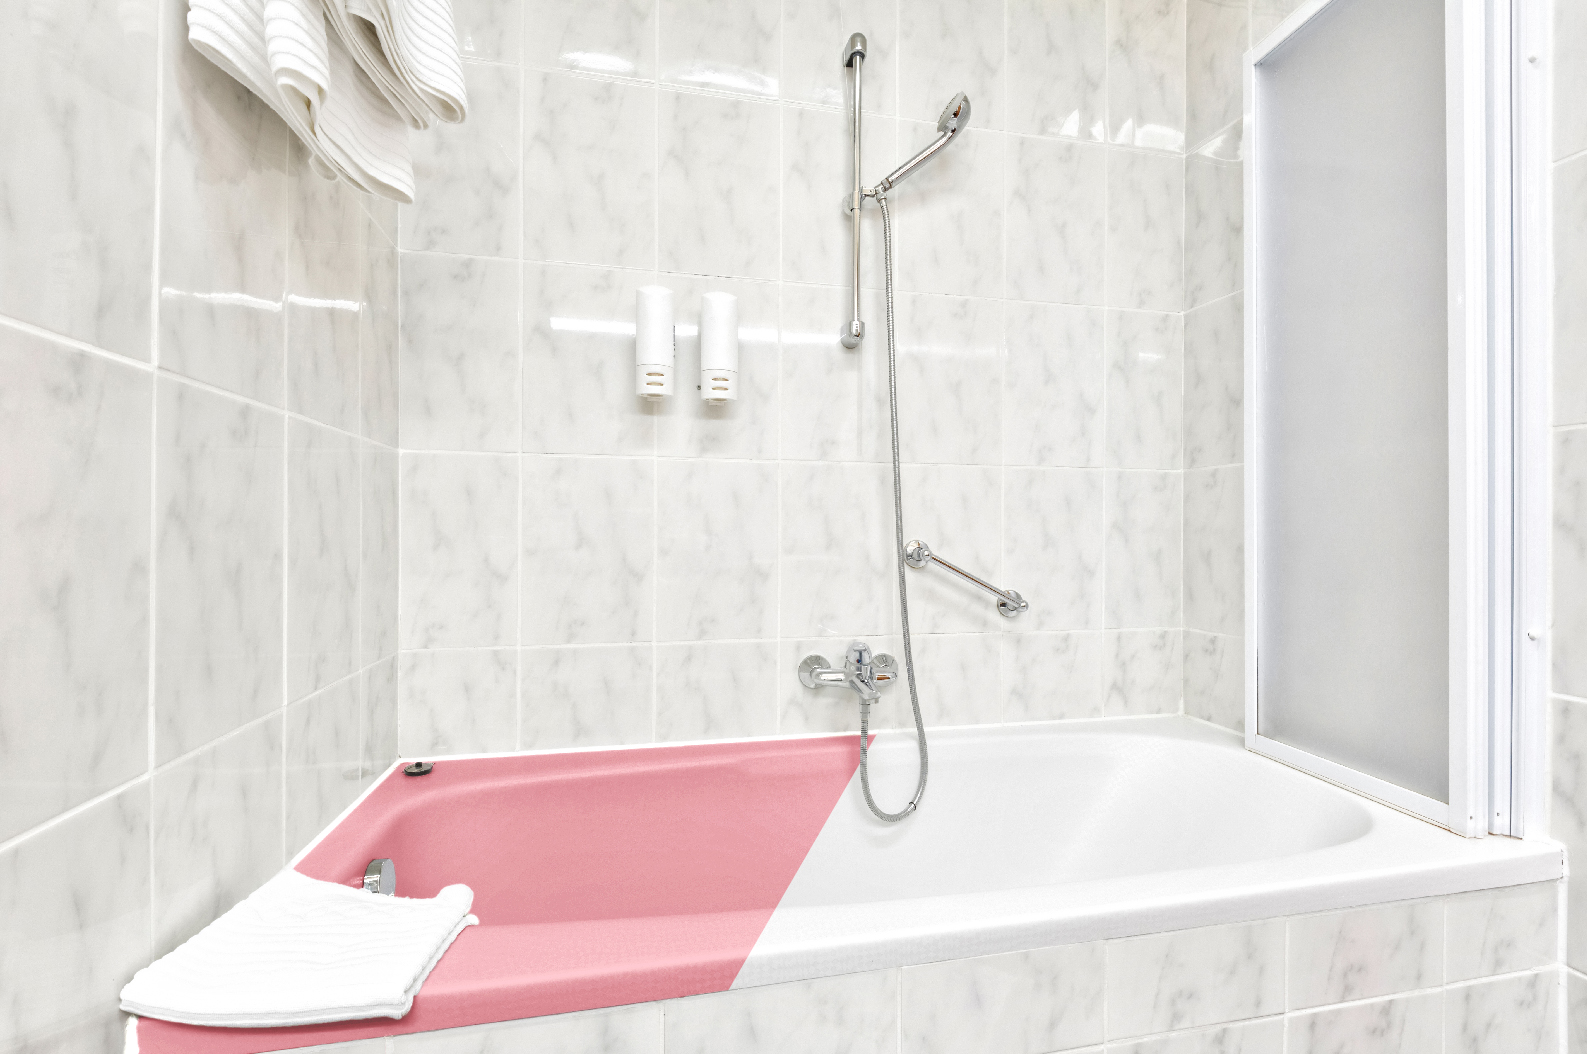
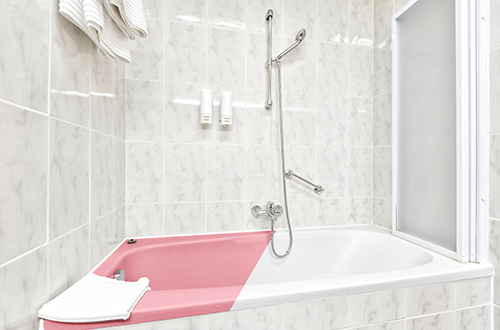
Tub & Shower
Though often forgotten, the tub and shower are one of the most heavily used areas of the home, and this wear and tear can easily show. But something as simple as painting them a new color can completely refresh the appearance of your bathroom.
Materials
- Shower cleaner
- Acetone-based remover
- Steel wool or sandpaper
- Painter’s tape
- Respirator mask
- Nylon paintbrush
- Paint roller
- Epoxy paint
- Remove all of the hardware in your current tub or shower. If it is not easily removed, tape off with painter’s tape.
- Clean the surface. A general shower cleaner will get rid of grime, but an acetone-based remover should be used on any stubborn spots.
- Scour the entire surface with steel wool. Make sure to wipe down any residual dust. (Note: You may need to clean and scour the surface multiple times until it is as clean as possible.) Make sure to let dry completely before painting.
- Using painter’s tape, tape off the areas of the tub you do not want painted, including any hardware or drains.
- Wearing a respirator mask, carefully stir the epoxy. Apply the initial coat, using a roller for larger areas and a paintbrush for hard-to-reach spots.
- Allow the first coat to cure for up to 72 hours before applying the second coat. Allow the second coat to dry for up to 72 hours before removing the painter’s tape and reattaching hardware.
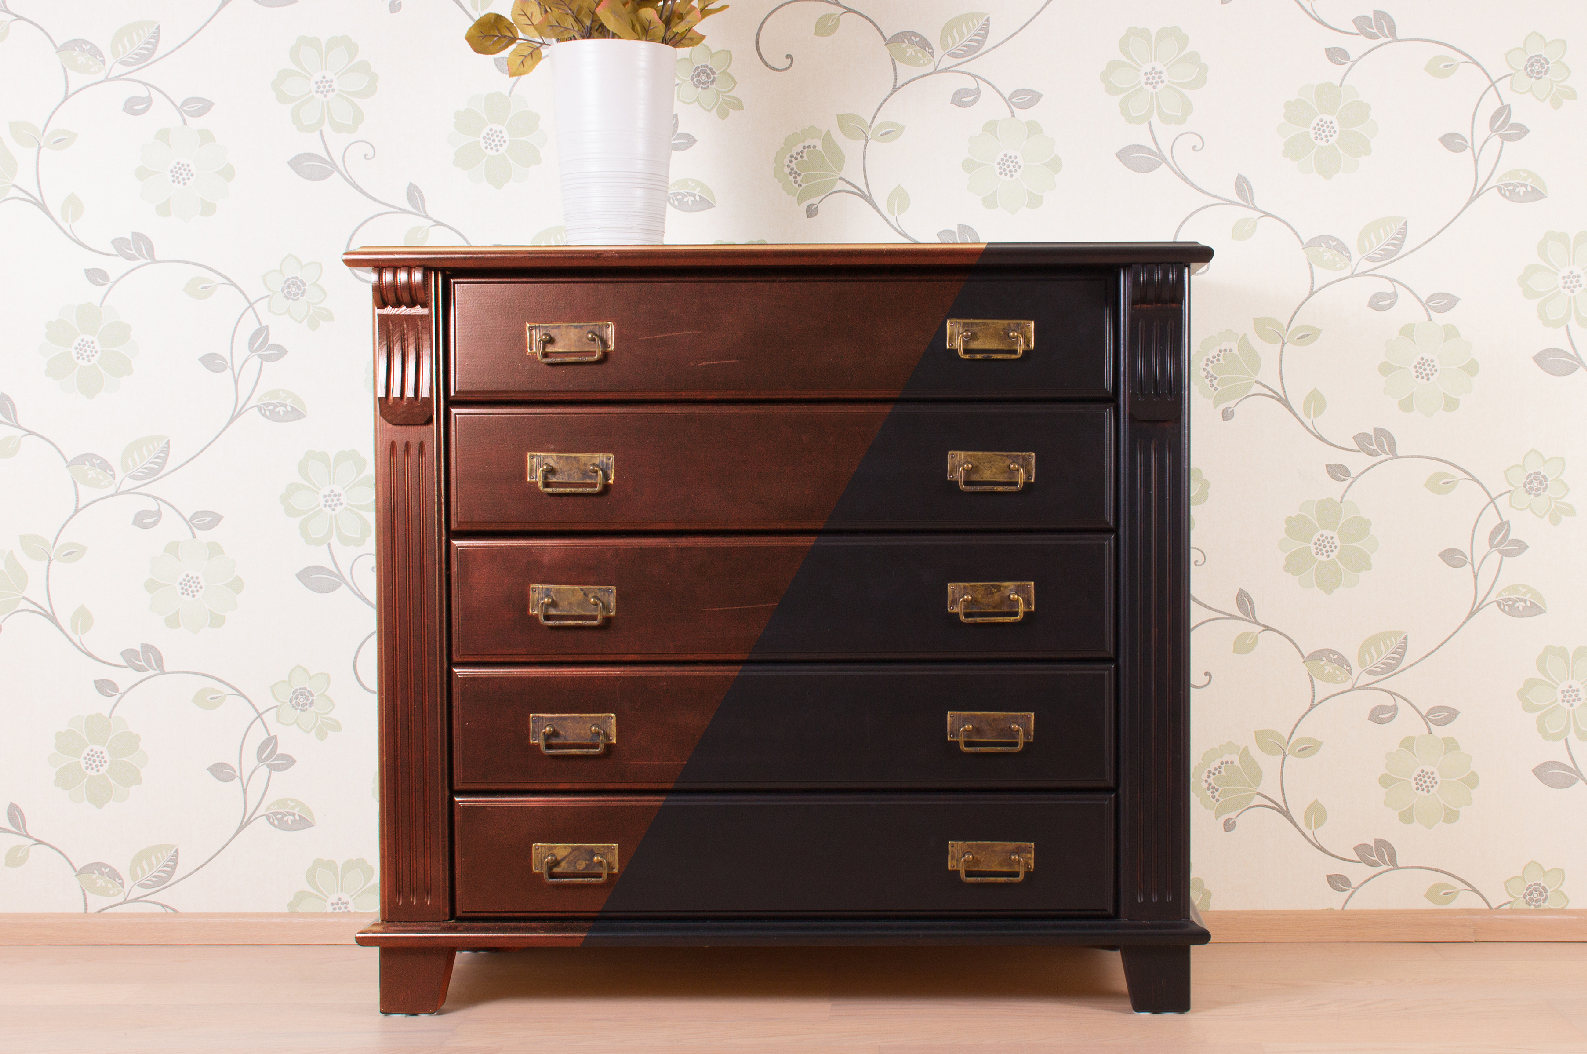
Wood Furniture
Unlike upholstered furniture, wood furniture can be easily renovated to match your own exclusive taste and style, and it can be sanded and repainted multiple times if your vision for a room happens to change.
Materials
- Sandpaper or sanding sponge
- Painter’s tape
- Primer
- Paint (oil-based, latex, chalk)
- Paintbrush
- Remove any hardware, drawers, and shelves.
- Gently sand the surface of the wood you are painting to create a smooth finish. Make sure to wipe clean.
- Using painter’s tape, tape off the areas of the furniture you do not want painted.
- Brushing with the grain, apply a thin coat of primer to the wood.
- Once the primer is dry, carefully apply two coats of paint, allowing the paint to dry in between each coat.
- Once completely dry, remove the painter’s tape and reattach any hardware.
Posted
in
Issue 82 Vol 1, Tile Gallery on Feb 01, 2017